Button Maker: Difference between revisions
From Makerpedia
JaneParson (talk | contribs) |
JaneParson (talk | contribs) No edit summary |
||
| (5 intermediate revisions by 3 users not shown) | |||
| Line 1: | Line 1: | ||
[[File:Button Makers.jpg|alt=A photo of the button makers in the Makerspace.|thumb|A photo of the button makers in the Makerspace.]] | |||
A button maker is a large metal tool used to press together the individual portions of a button. | A button maker is a large metal tool used to press together the individual portions of a button. | ||
{{#Widget:yt|id=83CKYkWvBk8}} | |||
== HOW TO USE THE BUTTON MAKER == | == HOW TO USE THE BUTTON MAKER == | ||
| Line 29: | Line 32: | ||
[[File:Button Parts.jpg|thumb|From left to right - The plastic back, the metal shell, the paper design, and the plastic protective sheet.]] | [[File:Button Parts.jpg|thumb|From left to right - The plastic back, the metal shell, the paper design, and the plastic protective sheet.]] | ||
[[Button Maker Tutorial|Button Maker Tutorial - Makerpedia (makerspace.cc)]] | [[Button Maker Tutorial|Button Maker Tutorial - Makerpedia (makerspace.cc)]] | ||
[[Category: | [[Category:Projects]] | ||
[[Category:Button Pressing]] | |||
[[Category:Tools]] | |||
[[Category:Makerspace Tools]] | |||
Latest revision as of 16:54, 28 July 2025

A button maker is a large metal tool used to press together the individual portions of a button.
HOW TO USE THE BUTTON MAKER
Step 1: Create design
- To start, create a circular design either 1" or 3" (Depending on the button press you've chosen)
- Make sure to put important information in the centre of your design! The edges will be cut off.
- Print this design out in a grid formation on standard letter paper.
- Or be fancy with it and make them shiny or something. I'm not your mom.
- Then, cut them out using one of the button punchers stored in the "Pin Making" box (Bottom Rightmost in the shelves)
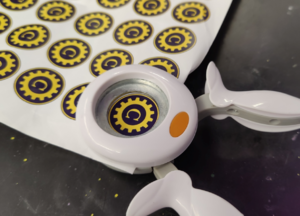
A button being cut from a sheet

Step 2: Make the Button.
- Your final button should consist of four parts. Make sure they're the same size!
- The plastic pin backing.
- The metal shell
- Your paper design
- The plastic protection
- Place the metal shell in the left chamber of the button press.
- Place your design and the plastic protection on top of that.
- KCHUNK IT, BABY!
- Place your plastic back in the right chamber
- KCHUNK IT AGAIN!
- Enjoy your delightful new button.

